

I love Easy Digital Downloads, and I love selling digital products.
Wether its a tiny little e-book, or a million dollar software company, EDD is a great platform to build your business on. I’ve covered plenty of reasons why you should invest in EDD for your business, and even broke down the costs of spinning up your first online store. I’ve even recommended a few plugins that will drive more engagement, and increase your annual revenues.
What I haven’t done yet is tinker with some of the settings that ship with a default EDD install. The following tutorial outlines a few of the switches I flip before launching, and a bonus strategy on increasing long-term engagement, with potential upsell opportunity.
Let’s do this!
The Journey
Just to give you some context with my EDD experience, I trust it to power my WordPress theme & plugin shops, which have combined revenues of well in the six-figure range. Which might sound like a lot, but if you know some of the big winners in the WordPress ecosystem, is just a drop in the bucket. The point isn’t the revenue numbers, but that I trust the platform, and the team even more, to be the heartbeat of my business.
Recently, I launched an e-book for podcasters, and I’ve kept careful track of the experience from start to finish. Finish? Who am I kidding? Optimizing your online store will forever be a work in progress!
Hopefully the following 5 tips will help you with your new store:
5 Things to do after install!
Watch the video to see this article in action, and don’t forget to subscribe.
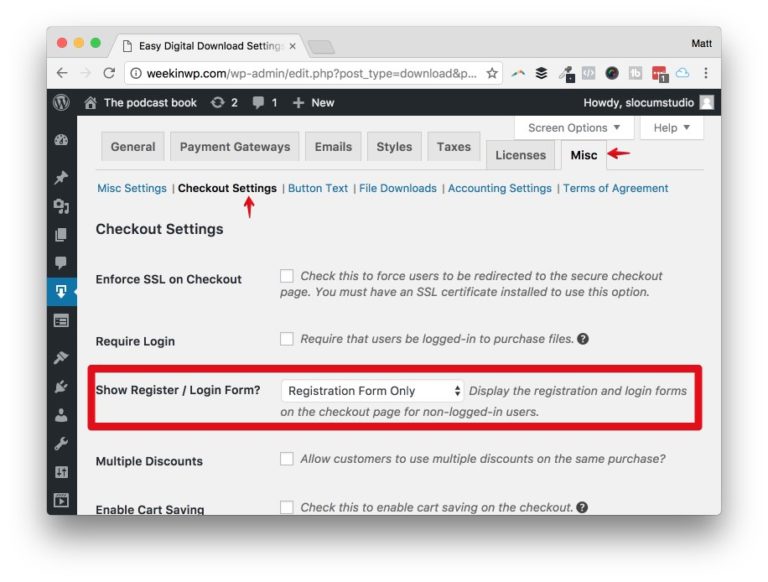
Step 1: Enable user registration
In my WordPress theme & plugin business, the most common support question is: where is my download?
By default, EDD ships with user registration set to off, on the checkout page. For my business, having someone register means they will have an account page where they could download their purchase, and get support. If someone can’t find their original e-mail that the store sent them, or accidentally deleted it, that account page is the go-to place for their payment history.
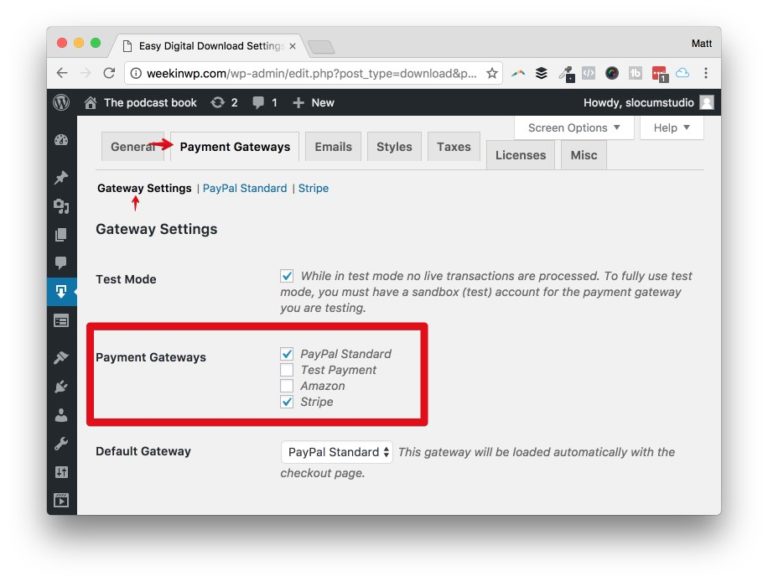
Step 2: Enable credit card processing on site
Doing this is going to cost you a bit of money, as you’ll have to purchase the Stripe add-on (or another processor of your choice) to install into your site.
If you’re just launching and don’t have the funds to invest now, I would certainly make it the first add-on you buy. By default, EDD ships with PayPal standard support which gets you your money, but as you see in the video it’s not the best method to ensure your customers convert.
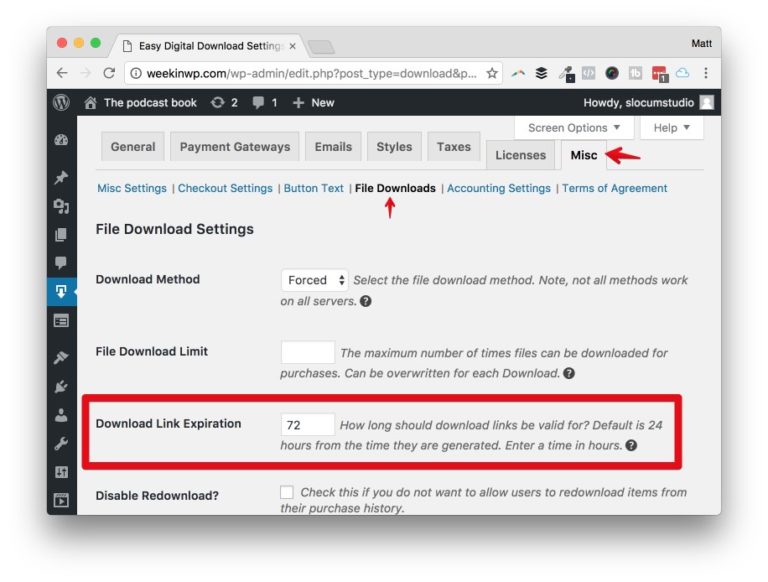
Step 3: Increase download link expiration
This is the second most popular request I used to get: my link expired! EDD ships with 24 hours set as the e-mail link expiration.
Picture this: someone buys your product at work on a Friday afternoon. It’s the last thing they checked off their busy to-do list, and then they left for the weekend. Sure, they got the e-mail, but by that time, they were already commuting home. Come Monday morning, that download link has expired, and your customer is frustrated.
I set mine to 72 hours, which is a fair amount of time, in my opinion.
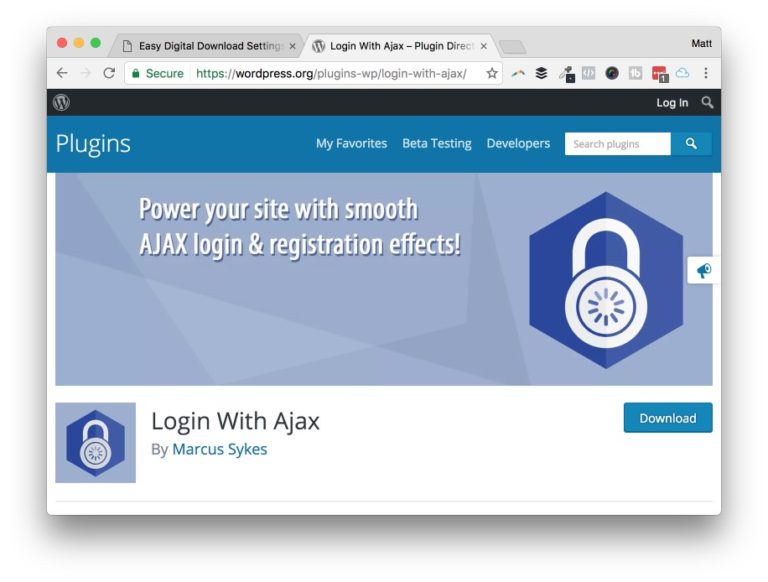
Step 4: Create a login link
There are many ways to tackle this scenario, but I suggest the Login with Ajax plugin.
EDD ships with a shortcode that you can use, but that doesn’t help you with usting it in a widget or sidebar. Sure, you could get a “shortcode in a widget” plugin — meh.
Login with Ajax has a shortcode, a widget, login redirects, and a few options for look and feel. I especially like the pop-up modal link theme, very slick! The other pain point this plugin addresses is redirection. When a user logs in, you can tell WordPress to redirect them to a specific page. In this case, I’d link them to your purchase history page.
Watch the video to learn more.
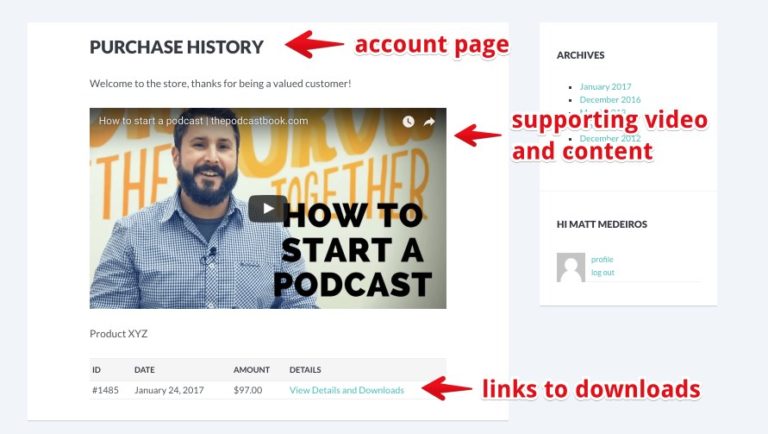
Step 5: Take advantage of your account page!
EDD makes it easy to designate a page as your payment history page by using a simple shortcode. Since you’re doing this on a normal page, use this as an opportunity to provide additional content, support videos, and even an upsell to another product or service.
Any user that logs into your site is going to be more engaged than just browsing your website. You can really tailor the experience with this approach.
Conclusion
There’s plenty of additional options you might want to fine-tune, but these are my most immediate settings to adjust when I launch a new store. How about you, do you do anything special with your product store? What kind of product store do you have? Let me know in the comments below.