


The Jetpack plugin was built to easily add a host of features that WordPress core doesn’t include out-of-the-box. It’s target audience, from my experience, are new users launching their first self-hosted WordPress website or users migrating from WordPress.com for more control over their website.
This is probably why it’s difficult to fully understand the main goal or purpose of the Jetpack plugin. Created by Automattic, it’s been at the center of debate for some time amongst the passionate WordPress community. It offers a large amount of features and functions for your website. From editor-type tools, to galleries, scaling all the way to website stats and content delivery network services.
A bit of history
In the beginning, because Jetpack was doing so much (side note: it does a lot more now), there were a lot of concerns over the performance impact it had over your website. There’s an age-old assumption that the more plugins you have, the slower your WordPress website could potentially be. In actuality, you could have one poorly coded WordPress plugin dragging down the load time versus 50 well-coded plugins humming along nicely.
Having said that, over the last year, the Jetpack team has put a lot of effort into not only streamlining the user interface (the pretty graphics and buttons you click) but also making the plugin much more performance focused overall.
A secondary concern was (and still is) that you’re required to have a WordPress.com account to activate the plugin and features. This is more against the grain from what’s offered in normal plugin activation of freely accessible downloads via your dashboard. While some might not like the idea of authorizing through a secondary service, it’s unavoidable with some of the services offered via Jetpack.
Let’s dive into some of those features.
Feature overview of the Jetpack plugin

There’s no way to avoid it; there’s a lot going on inside of Jetpack.
We’ll cover more in-depth, feature-by-feature as our series progresses, but for now, we’ll focus our attention on a basic overview of what’s included.
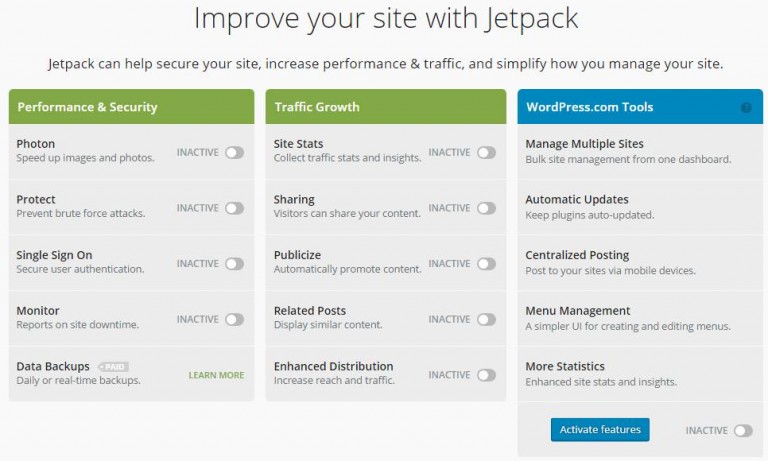
The Jetpack team has done an excellent job of refining the organization of the options within the dashboard. What once was just a super-long list of toggle switches, is now neatly filed away based on the user’s context.
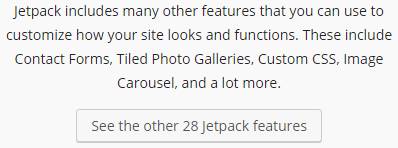
As of this writing, there are 28 total features to enable or disable within Jetpack:
Traffic growth
- Enhanced Distribution

Support this site. - Publicize
- Related Posts
- Sharing
- Site Verification Tools
- Subscriptions

WordPress.com
- Site Management
- Site Stats
Security and performance
- Monitor
- Photon
- Protect
- Single Sign on
- VaultPress
Appearance
- Carousel
- Extra Sidebar Widgets
- Gravatar Hovercards
- Infinite Scroll
- Mobile Theme
- Tiled Galleries
- Widget Visibility
Writing
- Beautiful Math
- Markdown
- Post by Email
- Spelling and Grammar
Developers
- Custom CSS
- JSON API
- Omnisearch
Other
- Comments
- Contact Forms
- Likes
- Notifications
- Shortcode embeds
- VideoPress
- WP.me Shortlinks
Read the official feature list of Jetpack.
Do you need to activate all of Jetpack’s features?

The big question is: do you need them all? Chances are, you won’t even come close. If you’re like most site owners, you’re going to enable only the features making sense for your particular situation.
That’s fairly straight forward, but let’s take a moment to plan for your website’s growth by using Jetpack forms as an example. In the beginning, you might only be planning to have simple contact forms for your visitors to contact you. Fair enough, using Jetpack contact forms should do the trick.
However, as your site grows, you might want your forms to do more “things.” Forms can become more powerful and a cornerstone to website functions. Things like, connecting to your favorite e-mail newsletter app or taking donations. You could even go as far as using more advanced form plugins for basic membership registration.
The point is, take a moment and give this some thought. While Jetpack offers a lot of great features for beginners straight out of the box, there are plenty of more advanced plugins offering more scalable features.
Who is the Jetpack plugin for?
“Connect your site to WordPress.com for traffic and customization tools, enhanced security, speed boosts, and more.” —Jetpack.me
That’s the current official tagline for Jetpack. Does that appeal to you? If it does, chances are, Jetpack is going to help you in some way.
Users migrating from WordPress.com
At the end of the day, it’s a must-have for users migrating from WordPress.com as you won’t find anything else supporting the pass through of web stats and other .com services you’ve grown accustomed to.
Self-hosted WordPress beginners
Jetpack is also for self-hosted beginners. I used my forms example above to shed some light on the power of a customized WordPress website, while it might matter for power users and online business owners, beginners might do just fine using standalone Jetpack. If you want less to think about while building your new WordPress website, this is certainly the way to go.
Power bloggers, SEO-minded publishers and DIY-ers

For me, this is where Jetpack shines. Not only do I get some easy to understand web stats (though I still recommend Google Analytics), I can apply the Photon feature to serve up my content images faster. Anyone looking to optimize their website knows speeding up image load times is paramount to user experience and conversions.
Like a lot of Jetpack features, there are some great third party plugins doing this too, but by
settling on using just Jetpack, we’re only worried about managing a single plugin.
Users who want to customize their website — a little bit
While I expect there will be more of these “mini features” to come, the Appearance section offers up some simple customization features for the beginner WordPress user. If you want some tiled galleries, carousels or to hide widgets on particular pages — Jetpack will do the trick. This is all done with very basic feature sets, but for the beginner in mind — that’s just what we need.
Users who manage a lot of WordPress websites
Another area the Jetpack team has focused on is website management. For starters, there’s a paid service called VaultPress you can upgrade to — more on this later. If you want to control your own backup destiny, or your host doesn’t offer it, this is spot on. The team is going further with this and offering features like security, spam and update management as well.
Wrap this all into your WordPress.com account and you have yourself a nice little centralized management tool that Automattic has dubbed: Centralized Site Management.
Clever, eh?
Is Jetpack for you?
As you can see, the waters get muddier as we expand the use case for Jetpack. I’m not saying this is a bad thing (this isn’t a review of Jetpack after all), but it might confuse you or make you pause to really think about what you’re putting into your website. If you fit into one of my user avatars above, Jetpack will probably fill a need of yours.
Like I recommend before installing any plugin: consider who is developing it first and foremost. Will they be around to continue development, support you, add more features, etc. Jetpack is built by Automattic, so you probably can’t find a safer bet than this.
Paid services within Jetpack
While a majority of Jetpack’s wonder is offered for free, there are some paid services within Jetpack that could make it more appealing to you. It’s important to understand Jetpack isn’t “freemium” which is to say, you don’t unlock more advanced or better features by paying — it’s still powerful without handing over a nickel.

Paid (major) features
- VaultPress
- VideoPress
- Polldaddy Pro
- Akismet
The paid features alone deserve their own overview, so I won’t cover them in a lot of detail here. VaultPress for backup, VideoPress for premium video hosting, Akismet for spam defense, and PollDaddy for creating and capturing survey from visitors. That said, there’s a ton of value in going paid, especially if you’re a business.
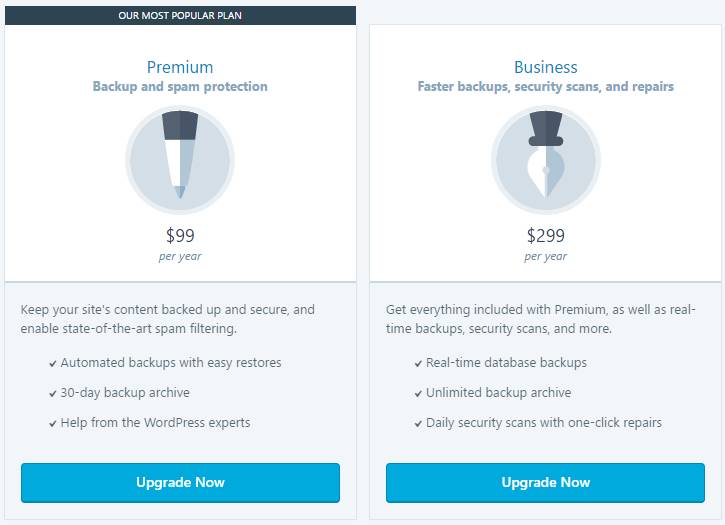
The plans are split into two annual plans: Premium for $99 or Business for $299.
I recommend doing further research into where you find the value in either plan, but I’ll stage it this way: For $299 a year you get real-time backup, Akismet Enterprise spam protection, and unlimited video hosting for a single site. That’s crazy good.
Installing and preparing to use Jetpack

If you’re already fairly comfortable at installing plugins and connecting to other services (think: connecting your website to Facebook or the like) you should do just fine tackling this on your own. Jetpack offers a great onboarding experience (in fact, they’ve open sourced it) that will guide you along the way.
Requirements
As I’ve mentioned throughout the article, you simply need to have a WordPress.com account to connect and activate Jetpack services. There are no other technical requirements as most of you will be running Jetpack on updated WordPress versions.
Conclusion
Hopefully this article has shed some light on the Jetpack plugin from a birds-eye view. There’s a lot to explore here, which makes it feel more like a platform than a single plugin as we’re used to using.
You can tune Jetpack to your liking, simply by disabling the features you don’t need. Activate one or all twenty-eight, whichever works best for your situation.
Have anything else to add about the Jepack plugin? Add your comments below!